Most glamping sites sit on uneven terrain, and their websites tend to publish vague accessibility details — a single “accessible” label with no measurements, no photos of the entrance and no mention of what the path from the parking area actually looks like. For wheelchair users, that means booking a luxury tent without knowing whether you can get through the door, let alone shower inside it. Wheelchair-friendly glamping does exist, but finding it takes specific questions and verified details rather than trusting a label.
This guide walks you through exactly what makes a glamping tent genuinely accessible, how to verify a property’s claims before you pay, and which questions to ask about the wider site — from dining areas to island transfers. We’ll also look at the settings where accessible glamping works best, when to book given how scarce adapted units are, and how to plan the rest of the trip beyond the tent itself. By the end, you’ll have a practical checklist for finding a camp that delivers on its promises.
What Wheelchair-Friendly Glamping Actually Means
A genuinely accessible glamping tent starts at the entrance. You need a step-free way in, with level or ramped access from the parking area — a ramp with a slope of roughly 1:12 or gentler is the standard to aim for. Doorways should offer at least 32 inches (81 cm) of clear width, which is the minimum for most wheelchairs to pass through comfortably. Many luxury tents look impressive in photos but hide a raised threshold or a narrow zippered opening that makes entry impossible without help.
Inside the tent: what actually matters
Interior features matter just as much as the entrance. Look for turning space of about 60 inches (150 cm) so a wheelchair can maneuver between furniture, a bed at transfer height rather than a low platform mattress, and a roll-in shower instead of a step-over tub. A beautiful tent with a deep soaking tub and no accessible bathroom is not an accessible tent, no matter how the listing describes it.
The paths between everything
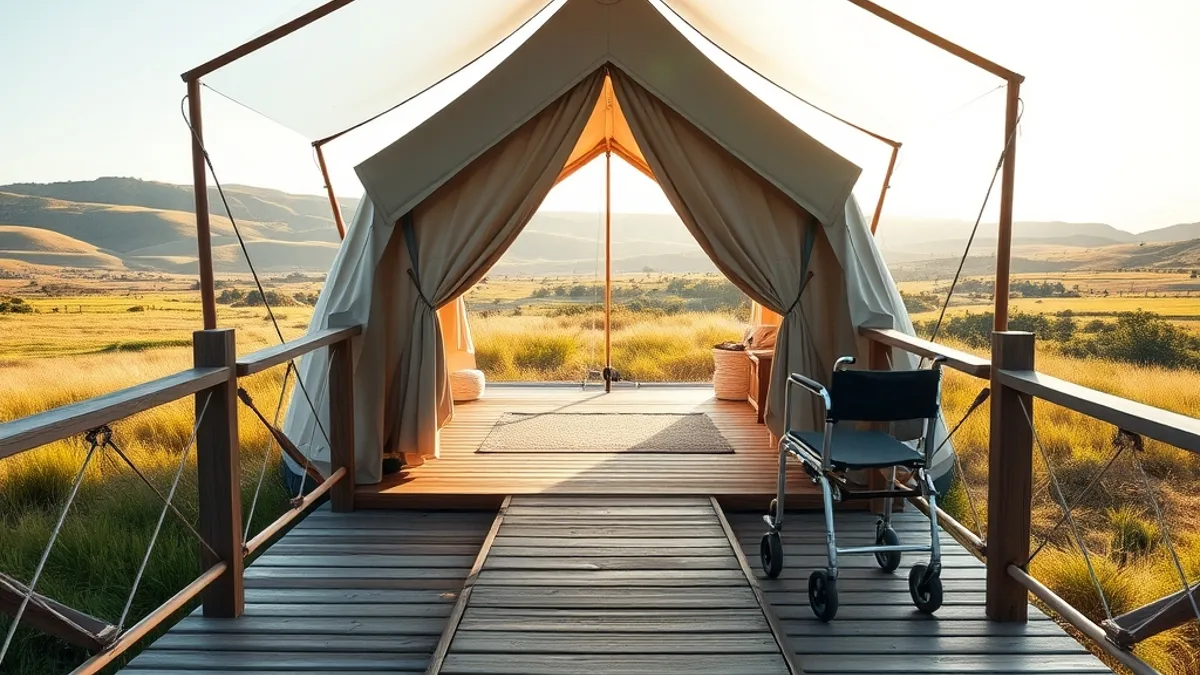
Finally, think about the terrain between your tent and everything else. The route from parking to tent to shared facilities must be firm and level. Gravel, sand and grass paths are common dealbreakers at glamping sites — they may look charming in photos, but they can be impassable in a wheelchair, especially after rain. Ask specifically what the ground surfaces are made of and whether boardwalks or paved paths connect the key areas.
How to Verify Accessibility Claims Before You Book
Accessibility claims vary enormously between properties, and a generic “wheelchair accessible” tag on a booking site tells you very little. Some properties use it to mean a gravel path smoothed over; others genuinely mean a step-free entrance and a roll-in shower. The good news is that most operators will happily provide details if you ask specific questions, so treat the booking process as a verification exercise rather than a leap of faith. Work through the steps below before paying any deposit, and keep notes of what each property tells you so you can compare answers side by side.
- Request a video walkthrough, not just marketing photos. Ask specifically for photos or a video of the tent interior, the bathroom and the full path from parking to your door. Marketing galleries tend to show the best angles; a walkthrough shows thresholds, slopes and the actual surfaces you’ll cross.
- Ask for exact measurements. Get numbers for the doorway width, the ramp slope (aim for roughly 1:12 or gentler), the bed height and the shower threshold. Vague answers like “it’s accessible” are a warning sign; a property that has genuinely adapted a unit will know its measurements.
- Compare the accessible unit to the standard ones. Ask whether the adapted tent is the same standard as regular tents or a downgraded version — some properties tuck their accessible unit in a less desirable spot or fit it with older furnishings.
- Check what help is available on site. Ask whether staff can assist with luggage or transfers. Knowing this in advance shapes how independently you can travel and what support you can rely on after a long journey.
If a property hesitates to answer any of these questions, or promises to “get back to you” without specifics, take that as useful information in itself. Operators who have invested in real accessibility are usually proud to document it, and a short video call with the manager can settle doubts faster than a dozen emails. Five minutes of verification now is far easier than discovering a problem when you arrive with your luggage and your plans.
Questions to Ask About the Site and Surroundings
An accessible tent is only part of the picture. Once you leave it, the rest of the resort — restaurants, pools, spas, activity areas — needs to work for you too, and this is where many glamping properties fall short. A tent can be flawlessly adapted while the main restaurant sits behind three steps, so ask direct questions about the wider layout before you book rather than discovering problems on arrival.
Start by confirming the distance and surface between your tent and the key areas: dining, pool or spa. A route that looks short on a map can turn out to be a long, sloped path in reality. Some resorts shuttle guests by buggy, which can be a genuine advantage if arranged in advance, while others expect you to walk. Then check whether on-site restaurants, lounges and activity areas have step-free entry, or whether workable alternatives exist — for example, room service, in-tent dining or seating in an accessible lounge if the main restaurant has steps at every entrance.
- Ask how buggy shuttles actually operate. Confirm whether they run on demand or on a fixed schedule, whether the vehicle has space for a folded or occupied wheelchair, and whether you need to reserve rides in advance.
- Check wet-area access specifically. Pools and spas often have steps only; ask whether there’s a ramp, hoist or transfer-friendly entry, and whether accessible changing rooms sit nearby.
- For island and rainforest resorts, ask how transfers work. Boats, seaplanes and jungle trails vary widely in accessibility — some resorts, like the tented camp featured in this jungle retreat in Bali, sit in dramatic terrain that deserves a careful conversation about arrival logistics before booking.
Getting these answers in writing makes it far easier to compare properties and hold each one to what it promised. It also gives you something concrete to reference if a feature you relied on is missing when you arrive, which makes resolving the issue on the spot much simpler.
Where Wheelchair-Friendly Glamping Works Best
Location shapes your accessible glamping experience more than almost any other factor. Flat coastal and island settings tend to work best, because many of them connect tents, restaurants and beaches with boardwalks and level wooden decks. A firm boardwalk is far easier to roll across than a grassy slope or a gravel trail, and coastal resorts often spread their facilities over level ground rather than stacking them on different elevations. Mountain and jungle camps, by contrast, commonly involve stairs, uneven paths and steep sections between units and shared areas.
Watch out for stilts, slopes and staircases
Some of the most photogenic glamping resorts are built on stilts or draped across hillsides, and that architecture usually means steps. Long staircases between the parking area, your tent and the dining deck can turn a dreamy setting into a logistical problem. Before you commit, ask specifically whether there is a lift, a ramp or a buggy service as an alternative, and request details on how steep and how long any ramp actually is. A resort that genuinely thought about accessibility will have a clear answer; vague replies are a signal to keep looking.
Size and track record matter, too. Established luxury resorts with many room types are more likely to have invested in one properly adapted unit, complete with a roll-in shower and step-free access, than a small independent campsite with a handful of tents. If a beachfront setting appeals to you, it can help to see how a full-service island resort handles access in practice, such as the approach described in this look at island seclusion at Six Senses Zil Pasyon. Larger properties also tend to have staff and equipment on hand to solve problems quickly when something is not quite right.
Timing Your Booking: Lead Times and Seasons
Accessible glamping units are almost always in short supply. Most properties operate only one or two adapted tents out of their entire inventory, which means the usual advice about booking early applies double here. As a general rule, aim to book 3-6 months ahead. If you want to travel during peak season, which runs June-August in Europe and North America, plan on 6 or more months of lead time to have a realistic chance of securing the adapted unit.
Why shoulder months give you an edge
Shoulder months like May and September-October are the sweet spot for accessible glamping. Availability is noticeably better, because you are competing with fewer travelers for that single adapted tent, and rates typically run roughly 15-30% lower than peak-season prices. The weather is often still pleasant in many destinations during these months, so you lose little in experience while gaining flexibility in dates and a calmer atmosphere on site.
One more thing to budget for: adapted units often cost 10-20% more than comparable standard tents. The premium reflects the real infrastructure behind them, from ramps and widened doorways to roll-in showers and reinforced paths. Rather than treating it as an annoying surcharge, think of it as the price of a tent that has actually been built for wheelchair users instead of improvised at the last minute. When you compare properties, always compare the accessible unit’s rate against the standard tent rate at the same resort, since the gap varies widely. And if the price feels high for your dates, ask whether shifting your stay by a week or moving into a shoulder month brings it down; with only one or two adapted units to fill, managers can sometimes be flexible outside peak periods.
Planning the Trip Beyond the Tent
The tent itself is only one piece of the trip. Getting to a remote glamping resort often involves a flight, a road transfer and sometimes a boat, and each leg can introduce its own obstacles. Confirm accessible airport transfers with the resort well in advance, and ask exactly what vehicle will meet you. A standard shuttle van with a high step and no ramp is useless if you cannot transfer into it, so specify your needs rather than assuming the resort will work them out. This matters even more for island and jungle locations, where the resort controls the entire transfer chain and there may be no alternative operator to fall back on.
Get it in writing
Once you have agreed on the details, ask the resort to send written confirmation of every accessibility feature that was promised: the adapted unit, the transfer vehicle, any assistance with luggage, and the specific excursions discussed. A written summary does two jobs. It forces the property to commit to specifics while you can still change your booking, and it gives the staff on arrival a clear record of exactly what was promised, so you are not relitigating the whole conversation at the reception desk after a long day of travel.
Before you finalize your plans, work through these practical points:
- Excursion compatibility: ask which specific activities, such as boat trips, nature drives or guided walks, can accommodate a wheelchair, and whether routes can be shortened or swapped for flatter alternatives.
- Guide adaptation: find out whether guides are used to adapting itineraries or whether they would be improvising on the day, since experience makes a real difference to how much you can actually join in.
- On-site backup: ask what happens if the transfer vehicle breaks down or the ramp is blocked, and whether the resort has spare accessible equipment or staff trained to assist.
- Weather contingencies: for boat or seaplane transfers, ask how the resort rebooks guests if sea or weather conditions cancel the crossing, since remote locations can leave you stranded without a plan.
Wrapping Up Your Accessible Glamping Search
Finding a luxury tent you can actually use comes down to verified details, not marketing language. A genuinely wheelchair-friendly glamping site offers step-free entrances with a ramp of roughly 1:12 or gentler, doorways of at least 32 inches (81 cm), firm level paths from parking, and roll-in showers instead of step-over tubs. Because most properties stock only one or two adapted tents, book 3-6 months ahead — longer for June-August peak season — and expect accessible units to cost 10-20% more than standard ones.
Before handing over a deposit, ask the property to show you exactly what you are paying for: photos or a video walkthrough covering the tent interior, the accessible bathroom, and every inch of the route from your parking spot. Request exact measurements in writing, and get written confirmation of every feature that was promised. When you have the choice, flat coastal and island resorts with boardwalks are generally safer bets than hillside or jungle camps built around staircases. If you have stayed at an accessible glamping site, share your experience in the comments or pass this article along to a fellow traveler.